Sunday, October 30, 2011

Handwork

It's becoming more and more uncomfortable to sit at my sewing machine for long periods of time, so I saved a lot of embroidery and other handwork pieces for the end of my pregnancy.

_DSC3217

I was never really into cross stitch  until I discovered the most darling patterns by Gera.

Hansel & Gretel crosstitch

I made this Hansel & Gretel one while I was pregnant with Phoebe, and I enjoyed it so much that I thought new baby should have one as well. 

_DSC3218

I ended up purchasing the Little Red Riding Hood pattern, and as you can see - I've still got a ways to go.  Since I was new to cross stitch when I made Phoebe's, I used 18 count Aida cloth.  However, this time I figured, "Oh, I'm an old pro at this", and went with some 28 count (28 stitches per inch).  Oh boy, does that make for some tiny stitches - and much slower stitching!

_DSC3224

Little Red herself is barely bigger than a quarter - and the pattern actually calls for 32 count, so I can't even fathom how teeny that would be!

_DSC3207

I'm also still plugging away at my Daisy Chain Crewelwork Sampler, and wishing that Alicia would come out with another one sometime in the future.  This has been such a fun, relaxing project to work on.

_DSC3127

And when I do get a little burst of energy here or there, I find my way back to my sewing machine and sew up some blocks for new baby's quilt.  Now who wants to come over and baste it for me?


Thursday, October 27, 2011

Costume sewing

Sorry for the week long absence - thanks for sticking around!  Let's just say that I have never been a happy pregnant person, to put it mildly, and I've been in some sort of pregnancy funk lately.  It doesn't help that I always end up getting a ridiculously huge and larger than normal pregnant belly (I didn't even leave the house my entire last month pregnant with Phoebe because people would seriously gawk at me), and I have been super uncomfortable, tired, and short tempered lately.  But I doubt you came to listen to me bitch about that - so onto more fun stuff!

So one thing that I churned out during this last week was Phoebe's Halloween costume.  Nothing like waiting until the last minute, huh?  When I was little, my grandma always made costumes for my sister and I, and when we got older, my parents kind of left it up to us to create something for ourselves.  Aside from some wigs and makeup, we never bought prepackaged costumes and I'm pretty sure that is what instilled my anti-manufactured Halloween costume beliefs.  

Halloween is such a great time for kids to be creative and help make something truly unique to wear on a day where anything goes.  I vowed before I even had kids that they would never wear one of those cheap, plastic, out of the bag costumes that promotes no imaginative thinking.  

*After rereading this I realized how harsh it sounds, and by no means am I trying to belittle parents who do purchase costumes from stores.  Not everyone knows how to sew, nor has the time - and who knows where I'll be next year when I've got two kiddos to sew costumes for.  Just my own personal thoughts regarding Halloween - and it's my blog and I can say whatever I want :)  Stepping off my soapbox now....* 

_DSC3189

So initially, I had wanted to dress Phoebe up as Rainbow Brite for Halloween.  However, Phoebe has made it well known to everyone that she has her own opinions and ideas now, and hence I was informed that I would be making a bunny costume this year.

_DSC3143

I bought a yard and a half of ultra cozy, micro-fleece at Joann's, and used two patterns that I already had in my stash.  The pants were made using the quick-change trousers pattern from Anna Maria Horner's Handmade Beginnings, and the hoodie was made using Heidi and Finn's Urban Unisex Hoodie pattern - previously blogged about here.

_DSC3178

I free-handed the ears, whip-stitching them into place, and used a knit shirt from Target's clearance rack to line the hoodie and make the pink for the ears.

_DSC3198

The only part that I'm super bummed about is that I should have gone up a size when making the hoodie, because it's a little short in the arm and waist length.  This kid is just growing way too fast!  

But Phoebe absolutely adores her costume, and hops to her little hearts content when she has it on.

_DSC3175

_DSC3149

Now we're working on the "trick or treat" part.  Phoebe absolutely refuses to say it, for some unknown reason, but would instead prefer to say "Booooooo!" followed by announcing "Phoebe's kinda scary!".

Tuesday, October 18, 2011

Some other fall going-ons...

Other stuff that's been keeping us busy around here but isn't really worth an entire blog post....

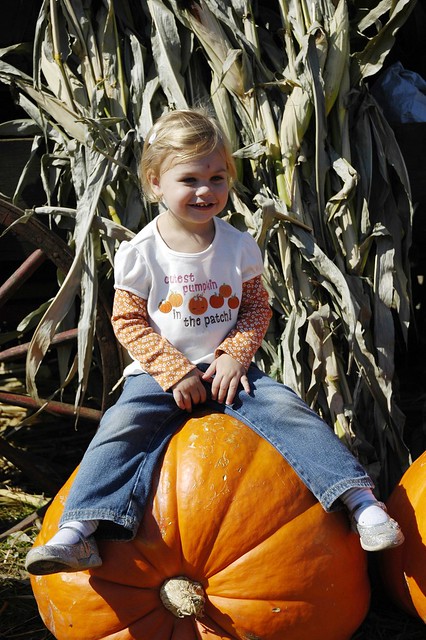
At the pumpkin patch
A trip to the pumpkin patch
_DSC3085
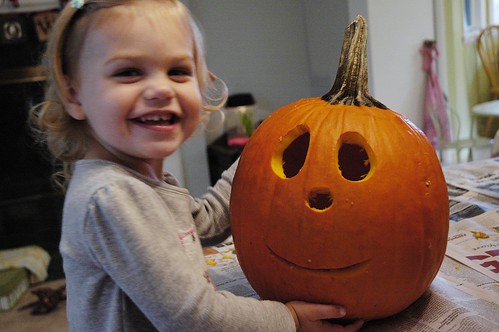
Followed by pumpkin carving (Phoebe requested that her pumpkin "have a happy face with oval eyes, a circle nose and a tiny mouth"
_DSC2989
Making button magnets (we spent a good deal of time washing them first - kept her busy for a solid 20 minutes!)
_DSC2591
_DSC2592
Multiple trips to the apple orchard


_DSC2611
_DSC2613
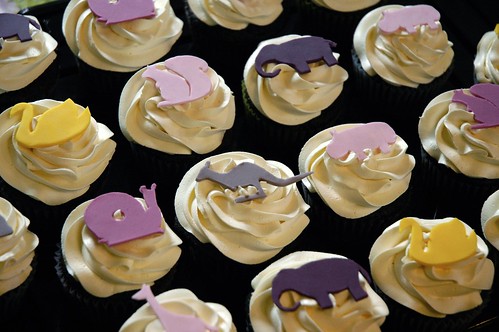
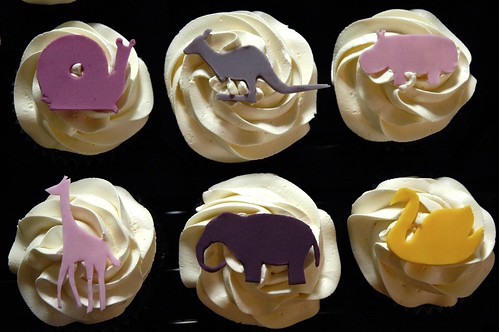
Making baby shower cupcakes.  Designed to coordinate with the invitation.

3rd trimester already - eeeks!

Sunday, October 16, 2011

Thrifting find of the year.... or at least the last couple of months

I've been a bit of a thrifting maniac lately.  I attribute it to a couple of things....  

1)  I've been kicking some butt in my Etsy shop
2)  I know my thrifting days are limited once I'm dealing with two kids instead of one.  Phoebe's pretty good at getting in and out of the car and even asks to go to garage sales every so often, but dragging two kids in and out of carseats will be another story.  Plus, I'm sure it will be a lot harder to dig through piles of junk with a tiny baby in my arms.
3)  It's totally in my blood.  My dad started taking me thrifting when I was Phoebe's age and once you start making those amazing finds and getting great deals, there's just no turning back.  

Also, all of this old "granny chic" stuff (as I like to call it), is completely my style, and you just can't find these things in stores nowadays.  Unless of course you go to Anthropologie, but then it costs an arm and a leg :)

_DSC3117

Sooooo imagine how thrilled I was to find this amazingly, fantastic, wonderful vintage chenille peacock bedspread at one of my local thrift shops this weekend.  It was balled up in a bag and laying on the floor.

_DSC3112

I actually didn't even know what was on it until I got home, but I saw the multi-colored chenille and the price tag of $2.50, and didn't think twice.  Turns out it's in amazing condition with no stains or holes, and there's only a few small spots where some areas of chenille have been pulled out.

_DSC3120

I've never seen anything like it, and after a quick search on Etsy, found that they are currently going for $150-$300, based on the condition, design, and size.  Zoinks!

_DSC3122

Of course, my husband is giving me major hell for not listing it in the shop, but I've decided that this lovely lady will be staying with us for the time being.  Plus, Phoebe is enthralled.  She keeps petting it and insists that it be laid out on the floor at all times for her own personal gymnastics mat.

_DSC3125

_DSC3107

Here is is on our queen sized bed.  Not exactly the style I'm going for in our bedroom, but definitely something to plan an amazing little girls room around someday.

Wednesday, October 12, 2011

Why don't we retire to the bedroom?

Remember this little sneak peak from way back when?

_DSC2233

Well I have finally, oh finally finished painting all of that damn trim and cleaned up enough to the point to show you my progress!

_DSC2340

You can see before pictures from when we bought the house back here, and even though it's taken us almost a year, it feels sooooo good to get that old person vibe outta here!

_DSC2344

As I mentioned before, our "master" bedroom is really just two rooms with a section knocked out between them by the previous owners.  We actually find the whole setup incredibly annoying since there's two entrances to our room (basically right next to each other), there's still enough of a wall that there's no good way to set up our furniture, and we struggled on what exactly to use that extra space for.

We were previously using it as kind of an office, but there was still a ton of wasted space, and we hated having our bedroom in full view when guests wanted to use the computer (mostly because it's always a mess).

_DSC2342
Please excuse the messy closet and piles of laundry - it's definitely my lest favorite chore.  Also, the closet doors will probably be going back up after they are repainted or covered in fabric.
 So it actually worked out rather well when we found out we were expecting baby #2 and decided to turn that awkward space into a nursery.

_DSC2355

We closed off that extra door (well, we put a large piece of furniture in front of it) so it will be nice and quiet, and of course it's super close to our bed for all of those late night feedings. 

Now that the painting is done, I'm excited to start decorating!  It's definitely a departure from Phoebe's soft, girlie, nursery that was full of pinks and yellows.  I'm looking forward to a new design challenge!

_DSC2351

My current dilemma - too many ideas!  I've been browsing way too many amazing nurseries on Pinterest and I want to incorporate ideas from them all!  Editing has always been my biggest design challenge.

_DSC2345

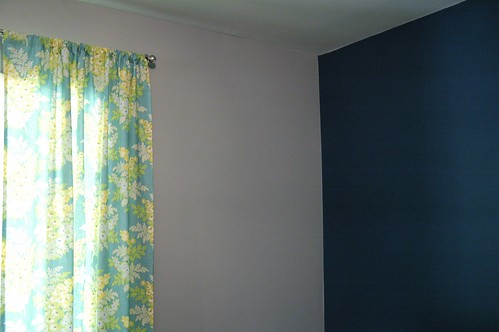
If you're wondering about paint colors and curtain info, I talked about it in my earlier bedroom post that you can find here.

Sunday, October 9, 2011

Another post about apples - but with fabric!

_DSC2940

I'm not really a love at first site type of person; when it comes to relationships, or my preference in fabric.  In fact, some of my favorite lines of fabric I particularly hated when they first came out.  I guess it just takes awhile for them to grow on me, and it usually always helps if I see them in person.  Us sewists are tactile people, and viewing a fabric online never really compares to handling the actual bolt.

Anyway, this has been the case with Aneela Hoey's latest line of fabric, Little Apples.

_DSC2933

After a few nights of helping my friend fill orders for her shop, two of these charm packs ended up coming home with me because I could not get them out of my mind.  It's such a fresh fall palatte - not the typical browns, reds, yellows, etc - and I just adore the addition of that dark olive.  I've seen so many people make quilts from this line and omit the olive colorway - but I think that's what really makes this line great.

_DSC2918

Since I only had two charm packs to work with, I added in some solids borders to make the quilt a little larger, and the green dots are from an older Moda line that I had in my stash.  I looked high and low for a solid olive that matched the charms, but nothing came even remotely close and I didn't feel like waiting around to order yardage.  Nevertheless, I think the dots work really well with the rest of the fabrics.

_DSC2922

For some reason, I always hate having to shell out more money for quilt backs, so I usually end up piecing them with my leftovers from the front, and anything else I've got lying around my stash.  Ohhhh, how I hate being on a budget.

_DSC2920

Even though it's definitely not my forte, I ended up free motion quilting this in an all-over pattern of leaves and loops that I totally made up as I went along.

_DSC2924

It looks pretty decent in this picture, but there are some very questionable looking leaves in other spots! 

_DSC2927

And the best part - this quilt is staying with us!  I know - sewing for myself - how decadent!

Thursday, October 6, 2011

Bite-size apple pies


_DSC2773

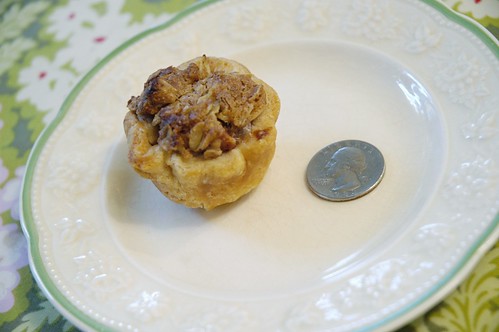
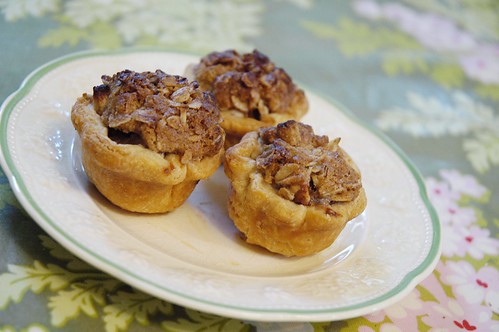
Is anyone else's house overflowing with apples?  Well, this recipe won't get rid of a ton of them (I think I only used 4 apples for the entire batch of two dozen micro-pies), but it's certainly a cute and delicious fall treat!  Everything is more fun in miniature, right?

_DSC2736

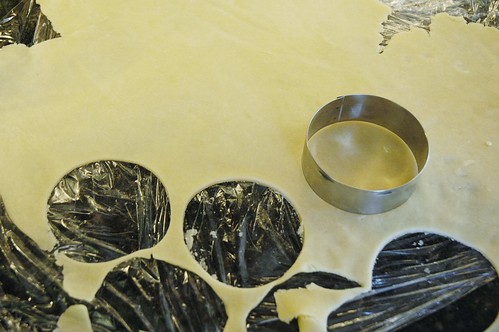
I started by rolling out some of my great-grandma's fantastic pie crust that had been chilling in the fridge (roll it out between two sheets of plastic wrap or parchment - it keeps it from sticking and you don't have to add any excess flour).  Then I used a cookie cutter to cut out 3 inch circles of dough.

_DSC2740

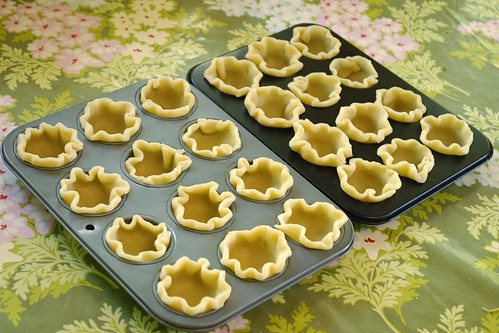
I nestled the dough into mini muffin tins and let the edges naturally crimp as they settled into place.

_DSC2749

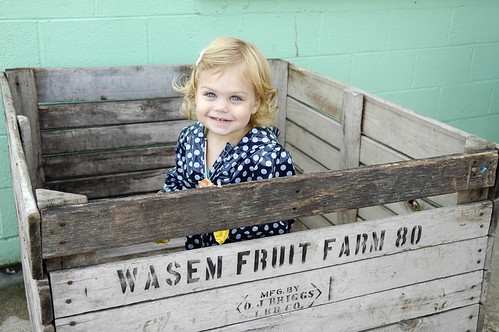
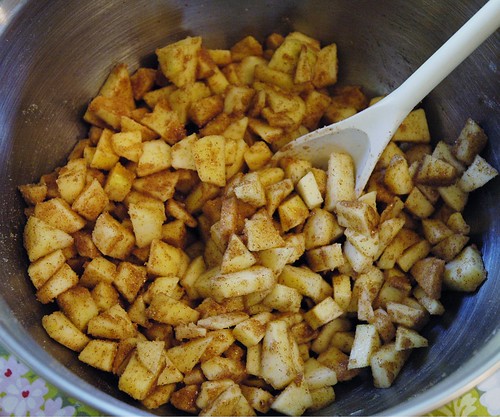
Then I mixed up my apple filling.  Like I said, it only took about 4 apples (I used golden delicious, picked from Wasem's Fruit Farm last week) mixed with some flour, sugar, cinnamon, and nutmeg to fill all of the tiny pies.  Sorry I can't provide exact amounts - I always eyeball measurements when I bake - contrary to what people say about baking being an exact science.  But then again, I rock as a baker, but completely suck at cooking.  Go figure.

_DSC2751

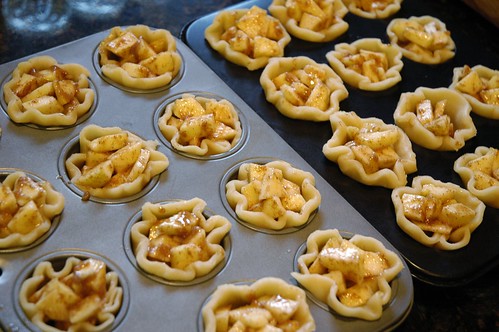
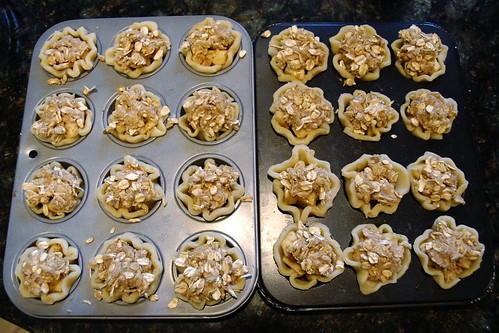
Fill your crusts with the apple filling, erring on the side of overflowing since the apples will cook down a bit.

_DSC2757

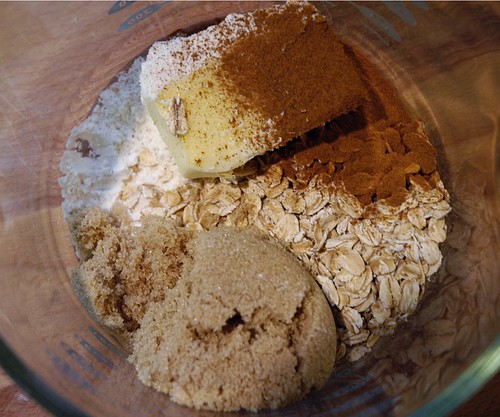
Then I made my crumb topping.  Once again, no measurements, but I promise that if you combine some butter, flour, brown sugar, cinnamon, and oats (not the quick cooking kind), you'll end up with something delicious.  

_DSC2762

Sprinkle the topping evenly over your pies.

_DSC2767

Bake at 425 for about 25 minutes, or until they are bubbling and the crust and topping looks nice and brown.  Prepare for squeals of excitement when you bring them to your next party.  Or just eat them all before 24 hours is up.  That's what happened in this family :)

Tuesday, October 4, 2011

Martha Stewart craft paint review and project

If you're friends with me on Facebook, you're probably sick of hearing me talk about my love affair with Martha Stewart's new craft paint line.  And no, I am not being paid to go on and on about this stuff (I wish I was!).

_DSC2723

First I was awestruck by the rainbow of amazing colors available in all sorts of finishes and their ability to paint on anything (wood, glass, plastic, fabric, metal, etc.), but what I really fell in love with was all of her specialty paints and finishes - specifically the magnetic and chalkboard paints.  I've seen these types of paint before at hardware stores, but only for upwards of $20 or so for a small container.  With my trusty Michael's coupons, I paid a grand total of $3.50 for the magnetic and $3.00 for the chalkboard paint.  And hey, slap a Martha Stewart logo on something and throw on some lovely packaging, and I'm pretty much sold before I even know what it is.  Sad, I know.

_DSC2730 

When we moved into our new house, we were lucky enough to have an updated kitchen with one of those fancy, stainless steel refrigerators.  Attractive - yes.  But I was bummed out about it's un-magnetic capabilities.  So I decided to transform this skinny 2 foot wide section of wall into a magnetic chalkboard  

_DSC2722

I taped off a 14" x 56" rectangle and first painted it with 2 coats of the magnetic paint which used up the entire container - it is some really thick and gloopy paint - but of course myself and a couple of friends all squealed in delight when it actually held magnets :)  And then painted it with 2 coats of the chalkboard paint, which took about 1/2 of the bottle.

_DSC2732

Then I put my husband to work framing it out with some simple trim that he picked up from the hardware store (I have a bit of a difficult time cutting miters the correct length).  

Next on the agenda?  To whip up some cute magnets to accessorize this baby!  I'm thinking some of these, some of these, and definitely some of these.

Have any of you tried out these paints yet?  I'd love to see some of your projects!